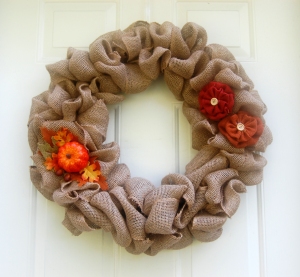
Somehow I seem to end up in craft stores fairly often, even if I don’t need anything (but to be honest, when do I ever actually need anything from a craft store?). I was in Michael’s the other day and I noticed a lot of burlap products, as well as the pre made wreaths they have for sale, and I thought ‘I could totally make my own.’ So I decided to do it. I bought some burlap ribbon and some autumn-themed embellishments, I looked up a few tutorials and I got to work.
I was amazed at how quickly I got the hang of this and how quickly I finished the wreath. I’m convinced anyone could do it even if you’re not a crafting queen like me.
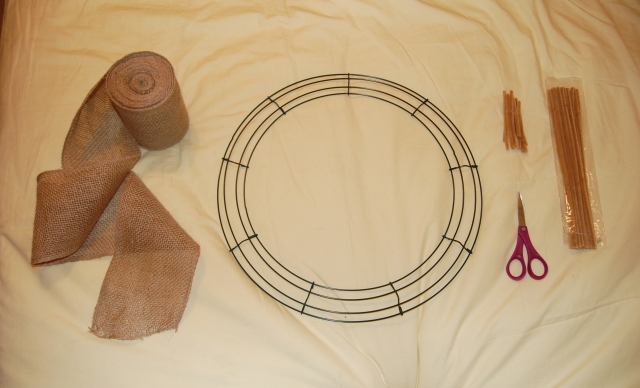
What you need:
- 2 rolls of burlap ribbon (the width is up to you, but the wider ribbon makes the wreath look fuller and easier to fill) (also my rolls were 10 yards long, so if you find a 20-yard roll, you’d only need one)
- one metal wreath frame
- decorations and embellishments of your choosing
- pipe cleaners or crafting wire, cut into approximately 5-inch pieces (I bought one pack of pipe cleaners and that is more than enough, so if you have some scraps lying around, I’d use them)
- hot glue
What to do:
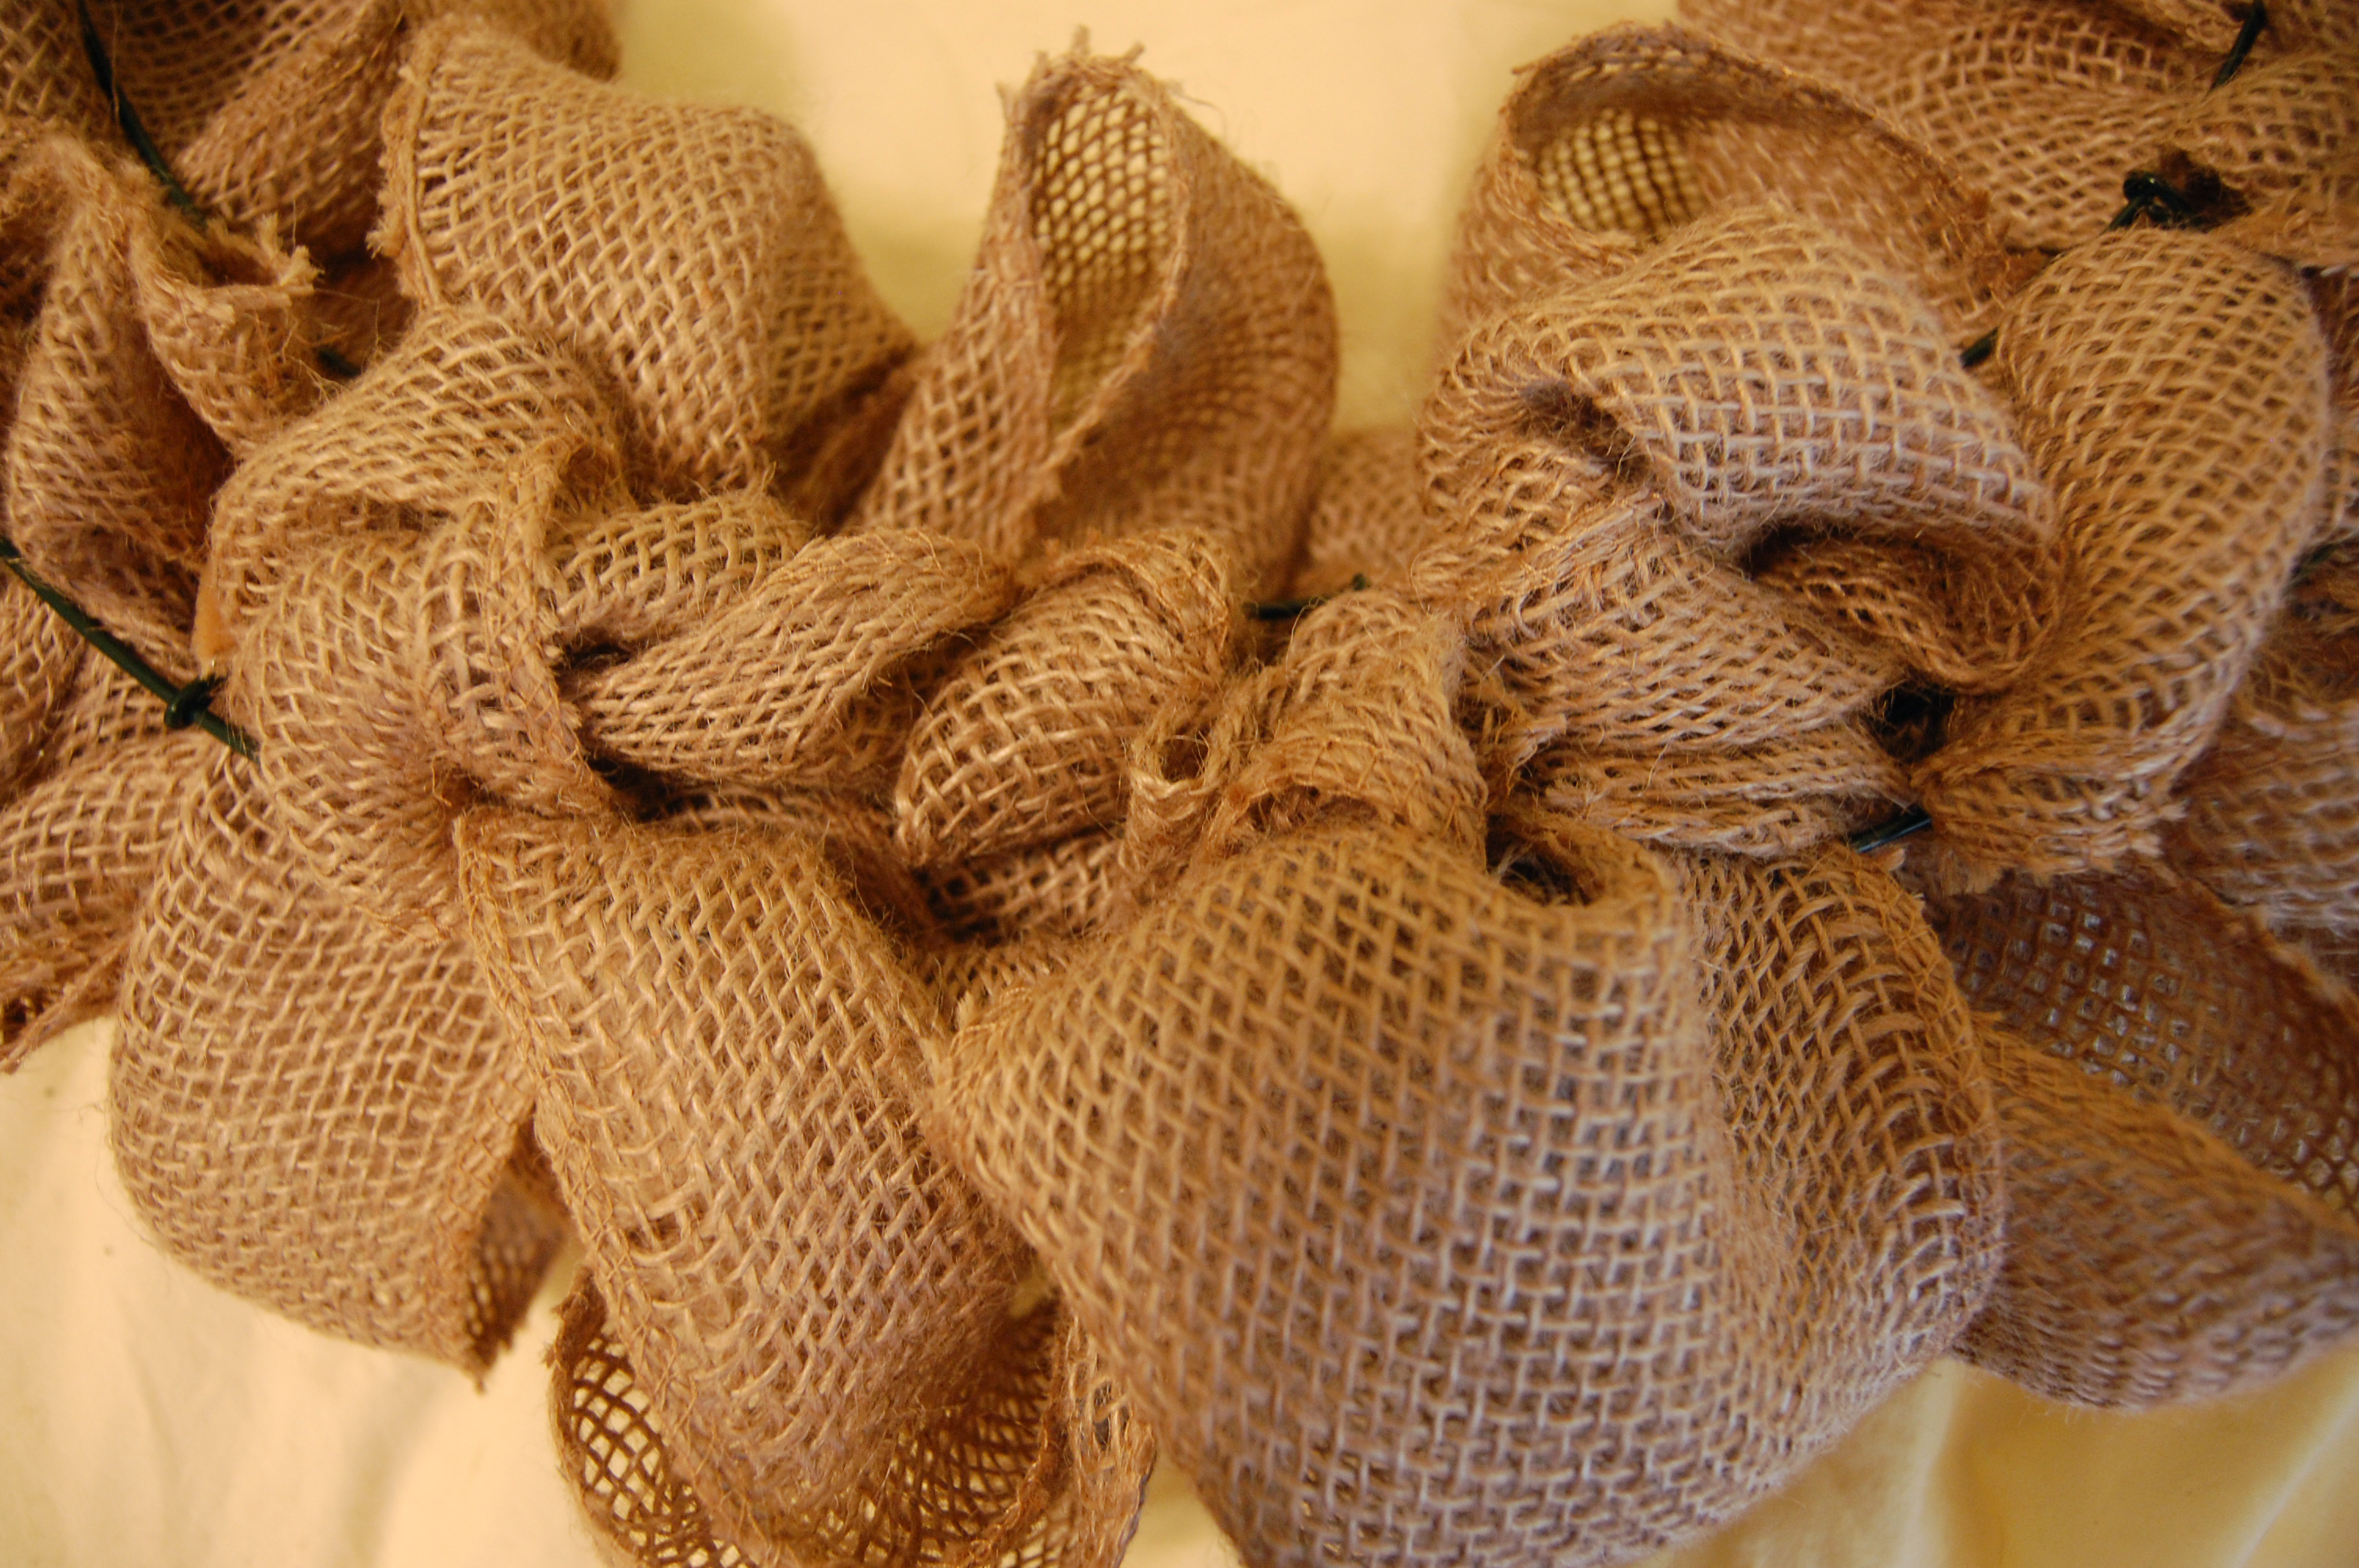
1. Use a pipe cleaner to attach a folded edge of burlap to the underside of the wreath frame. If yours is like mine, I recommend starting at the beginning of one section where the metal goes across the frame.
2. Pull the burlap through the nearest opening, making a loop that peaks out onto the top. Don’t try to pull the entire length all the way through.
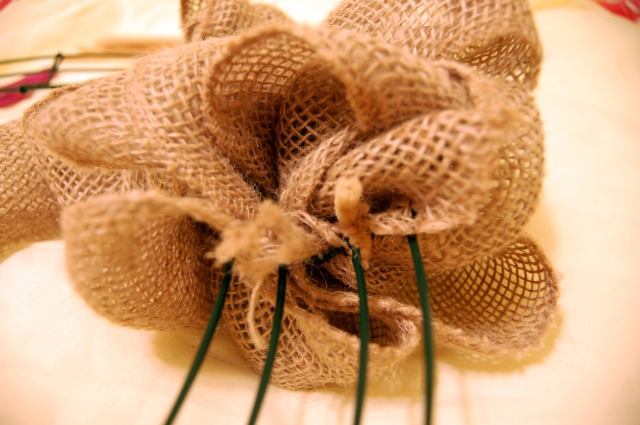
3. Twist the end of the burlap two or three times and then pull a loop through the next section of the metal frame.
4. Keep repeating until you go all the way around. I typically had 6-7 loops in each section of the frame. And I found it was best to work typewriter-style, meaning once you get to the third opening in a section, go back to the first opening instead of trying to snake around and go back the way you came.
5. Once you get to the end, use a pipe cleaner to attach the end to the metal, the same way you did in the beginning.

Top

Bottom
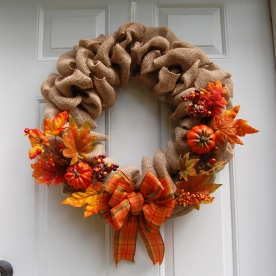
6. Arrange your decorations on your wreath any way you can and then glue! Or use the pipe cleaners or wire to attach them if that’s easier.
One of the great things about making this wreath is that your mistakes are hidden and you really can’t mess it up. Make the loops go in whatever direction you want, in whatever size you want. And if you find your burlap isn’t going along in a nice pattern of loops, that’s ok! Mine didn’t either at first and I didn’t even fix it. As long as loops are showing and you like the way it looks, it doesn’t matter how it happened.
If anyone makes one, I’d love to see what you do differently! There are so many different ways to decorate these wreaths, I had a lot of trouble deciding what to do with mine. (:

Enjoy xx